Thursday, January 3, 2013

Cookie Catastrophe

     I usually like to think of myself as being pretty adept in the kitchen. I can't say that I can slice, dice, chop and fry like a Food Network star, but I do know how to use a pan, a knife and a recipe with proficiency and at least some grace. Unfortunately, just when I start to feel confident with my developing kitchen skills, along comes a humbling experience. It just so happens that one notably humbling kitchen experience occured over Holiday break.
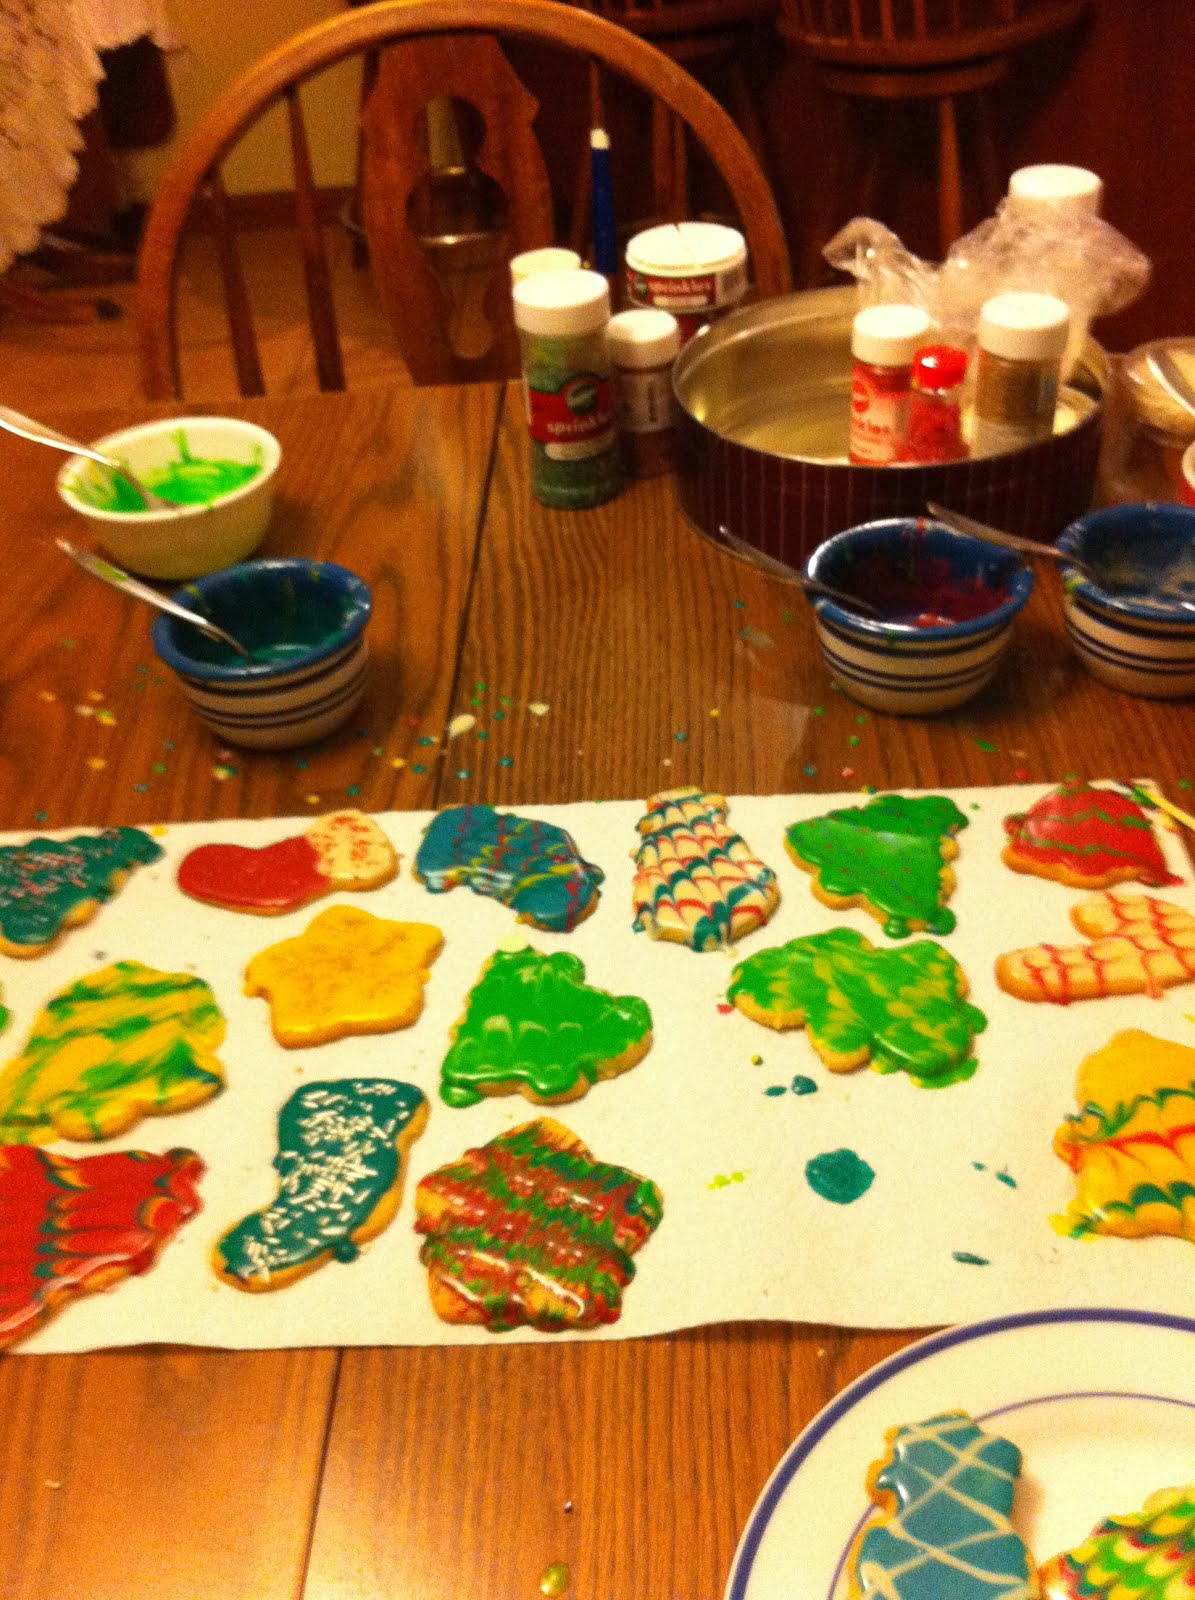
     When I got home from school, I was especially excited to blow off my finals steam with the heat of a nice warm oven. In the spirit of Christmas, I decided to make some classic sugar cut outs for the family and me to decorate. The cookies came out quite well, crispy on the outside and chewy on the inside, spiked with the delicious smell of cinnamon . After letting them cool, I made some icing and my mom and I decorated the cookies while watching Christmas movies. Nothing could feel more cozy and Christmasy than a warm kitchen, a Christmas movie and decorating festively shaped cookies. To add to the enjoyment, my dad loved them! He ate at least 3 that night and within a day, told me that I would have to make more.  The recipe made three dozen deliciously decorated cookies, but, despite the joy they brought, there just wasn't any room for them. So, to try to save space, we stored the excess cookies on plastic Christmas plates in the oven for safe keeping (or so we thought).
A few days later, I was still in the mood for holiday baking, so I decided to surprise my mom with a breakfast of her favorite nut cookies, fresh from the oven. In an effort to complete the dough and bake the first batch before my mom woke up, I hastily gathered the ingredients, read through the recipe and preheated the oven. The dough came together quite easily, and it was ready to be filled and rolled within a half an hour of starting the recipe. It was my first time trying the recipe and I was ecstatic that everything was coming together so quickly and smoothly. But then, I smelled it...
It was that awful, burnt rubber kind of smell. I pealed myself away from my feverish dough-rolling and turned around to see smoke billowing out of the oven. I ran to the kitchen, opened the oven door and saw my dad's favorite cookies (burnt to a crisp) perched precariously on top of melted plastic. At the bottom of the oven, a small fire was burning. I was terrified. What if something else caught on fire and burned the whole house down. Like any logical person, I began to scream and shout a few unnecessary explitives. Instead of waking up to a lovely batch of nut cookies, my mom woke up to a smokey kitchen and a screaming daughter.
Thanks to my mom's amazing ability to stay calm in high stress situations (obviously, it's not genetic...) and some quick thinking, we managed to put out the fire, air out the house with countless open doors and windows, and clean up the sticky, plastic mess that covered the inside of the oven. The nut cookies were baked in my grandmother's oven (who conveniently lives right next door) and my house is still standing. A few days later, I even regained enough confidence to make a second batch of the sugar cookies without the tantilizing scent of melting plastic.
So, even though I was knocked down a few pegs due to my kitchen mishap, I certainly added an interesting story to my Christmas party small talk arsenal. And, despite the untimely death of countless sugar snowmen, stockings and Christmas trees, I enjoyed making both the first and second batches of the cut-out cookies. (Hey, anything is better than studying for an Organic Chemistry final...)
 

Christmas Cutouts

Dough

·         ½ cup margarine or butter (or 1 cup for thicker cookies)

·         1 cup sugar

·         1 egg

·         1 Tbs. milk (or cream)

·         2 cups flour

·         1 ½ tsp. baking powder

·         ½ tsp. salt

·         ¼ tsp. white pepper

·         1 tsp. cinnamon

Icing

·         1 ½ cups XX sugar

·         2 Tbs. cream

·         1 ½ tsp. vanilla


Cream butter and sugar until smooth. Add egg and milk and beat well. Sift together flour, baking powder, salt, ginger, white pepper and cinnamon. Add to butter and sugar mixture. Chill, roll to ¼ inch thickness, and cut. Bake at 350° for 10 minutes, or until lightly browned at edges.

                For icing, beat sugar, cream and vanilla until smooth. Separate into bowls and add color (optional).


Wednesday, November 21, 2012

Ana- what-a? bread


After a very stressful two weeks filled with Organic Chemistry, Physics and Microbiology exams, its good to finally be home for Thanksgiving break. I can finally just deflate, just let all the stress, worries and craziness completely leave my mind. I love having my soft warm bed, cuddling with my dogs, and, most of all, having free reign of the kitchen. Am I in the mood for some fresh baked bread, a hot bowl of oatmeal, or homemade soup? Well, all I need to do is head to the kitchen, gather some ingredients from the well stocked (and NOT dorm-sized) kitchen, and work some magic.

Apparently, I'm not the only one taking advantage of my unhindered access to the kitchen. My mother, well aware of the my love for epicurean adventures, has not so subtly used my affinities to her advantage. The first night I was home, she informed me that she had all the ingredients for chili in the fridge, and, if I had NOTHING to do, it would be just awesome if I made it. Of course, I willingly aquiesced. I mean, hey, she offered to do my trash bag full of laundry. I'd say that's worth me making dinner for her.

The same evening, I decided to try out a recipe for pumpkin cinnamon rolls filled with homemade pumpkin butter. I prepared and rolled the dough  and allowed them to set in the fridge, so they would be ready to bake in the morning. Unfortunately, I woke up to a few stubborn rolls that had refused to rise. I allowed them to sit in the fridge while I decided how I was going to coax them into some delicious fluffy rolls. My mom woke about a half an hour later, peaking into the kitchen. After saying good morning, the first words out of her mouth were "I was expecting to wake up to the smell of cinnamon rolls." After I explained what had happened, she smiled and said, "I guess I'll just have to wait."


During a pre-Thanksgiving grocery run, Mom found a jar of coconut curd in the jelly aisle. Curious, she grabbed a jar and added it to the cart. Later, when we had finished unloading and putting away the groceries, she said, " This coconut curd would be delicious with some warm, nut bread." Of course, at the thought of warm bread, my mind started churning. Mmm, warm homemade nut bread, maybe with some roughly chopped walnuts. I immediately began searching for recipes on my phone and found a simple recipe for Anadama Bread from Eating Well. It looked delicious and easy, sweetened with molasses and made without ANY shortening. The only thing that left me wondering was.... What is Anadama Bread?

According to Food History, the bread originated from either Gloucester or Rockport, Massachusetts during the nineteenth century. The bread has a few legends associated with it, but one thing that is know for sure is that it was produced by small bakeries in the fishing community. Regardless of its history, with molasses and cornmeal, the bread has a unique texture and a delicate, smokey sweetness.

Anadama Bread

Ingredients

  • 1/4 cup cornmeal, preferably stone-ground
  • 1 1/3 cups boiling water
  • 1/4 cup molasses
  • 1 1/2 cups whole-wheat flour
  • 1 1/2 cups bread flour, or all-purpose flour
  • 1 package RapidRise yeast
  • 1 1/2 teaspoons salt
  • 1 egg white, mixed with 2 teaspoons water for glaze
  • * 3/4 cup chopped walnuts

Preparation

  1. Combine cornmeal and boiling water in a large glass measuring cup. Add molasses and let stand for 5 minutes or longer to soften the cornmeal and to cool the liquid until it is the temperature of a baby's bottle (105 to 115°F).
  2. Combine whole-wheat flour, bread (or all-purpose) flour, yeast and salt in a food processor. Pulse to mix. With the motor running, gradually pour the cornmeal mixture through the feed tube until a ball forms. Process for about 45 seconds to "knead" the dough (it will be sticky). Turn the dough out onto a floured surface. * knead in chopped walnuts. Cover with plastic wrap and let rest for 10 minutes.
  3. Coat a baking sheet with cooking spray. Dust with cornmeal (or flour), shaking off excess. Punch down dough and form into a 7-inch-diameter round loaf. Place on the prepared baking sheet. Cover lightly with plastic wrap that has been coated with cooking spray and let rise until doubled in bulk, 40 to 45 minutes.
  4. Set a rack in the center of the oven; preheat to 425°F. Just before baking, place a shallow pan of hot water on the lowest shelf in the oven.
  5. Brush the risen loaf lightly with the egg-white mixture, taking care not to let it drip onto the pan. Use a sharp knife to make two slashes, 1/2 inch deep, in a crisscross pattern on top.
  6. Bake the bread for 10 minutes. Brush again with the glaze and rotate pan 180° (from front to back). Lower oven temperature to 400° and bake for 10 to 15 minutes more, or until golden and the bottom sounds hollow when tapped. Transfer the bread to a wire rack to cool.
* indicates modifications


The glaze and baking the bread with a pan of water made the perfect crust while still maintaining the soft, chewy inside. The recipe was super easy, quick and (accoring to my mom) perfect for COCONUT CURD!

Thursday, November 1, 2012

MMMM pumpkin!


Looking at the photos of the devastating effects of Hurricane Sandy gives me chills (not to mention the chills I get from the frigid cold weather that she brought with her). Seeing the damage and destruction that she imposed is a Halloween fright much scarier than any ghoul or goblin.  Pictures of cars underwater, seaside houses engulfed in sand, and countless misplaced families are plaguing the internet, reminding all of the imminent rebuilding that is to come.  All I can to do is pray for those who have lost so much and thank God that my home and family are safe.
But I also thank God for the beautiful fall that preceded Sandy. Words cannot even describe the vibrant colors, cool autumn air and overall beautiful environment that characterized the months of September and October this year. I found myself frequently stopping on my walks to and from classes to take pictures (to the point where I was almost late for class… oops).  Without any color retouching, the pictures turned out with astonishing hues of red, orange, yellows and browns dominating the frames. Like the leaves that sprinkle the cold ground, I have fallen for fall.

Fall, the last hurrah before a long cold winter, is truly a colorful celebration of the end of a year of life. As the trees shed their leaves and the corn crops yield their harvests, we celebrate the abundance of nature. We cuddle up in warm, cozy sweaters and suede boots as we stand encircled by the cool, fall breeze. We enjoy the tastes and colors of our favorite fall foods, such as apples, winter squash and pumpkins…. Oooh…. Pumpkins!

Pumpkins are truly an iconic fall product. They are the plump, orange vessels that you gladly carved faces into in preparation for Halloween, and the fleshy, sweet vegetables that you prepared and baked into pies. But now, with the popularity of pinterest and the plentiful output of the vegetables this year, pumpkins have established an even more prominent and diverse role in our lives. Everywhere from Bath and Body Works to Starbucks, pumpkins have been included… No, showcased… this season.
Perusing pinterest this fall, I have come across some interesting (yet delectable) pumpkin recipes, including pumpkin pancakes, pumpkin muffins, pumpkin ice cream, pumpkin cupcakes, pumpkin smoothies, pumpkin lattes, pumpkin oatmeal, pumpkin chili, pumpkin risotto (For some reason, this reminds me of Bubba’s shrimp speech from Forrest Gump)… an d this list never ends. I have seen entire boards on pinterest dedicated to the wonders of pumpkin.
So, naturally, when I had the opportunity to go to my kitchen, I mean, go home, I had to bake something with pumpkin. Since I love breakfast and am addicted to bread, I chose to make pumpkin pie bagels. They are decently healthy, at only about 200 calories for 9 bagels, plus, they are very delicious. All the delicious flavors of pumpkin pie in a cute, little, convenient package.

 
Pumpkin Bagels (Lady Behind the Curtain)
Ingredients
-          2/3 cup water (70 to 80 degrees)
-          1/2 cup canned pumpkin
-          1/3 cup packed brown sugar
-          1 teaspoon salt
-          1-1/2 teaspoons ground cinnamon
-          3/4 teaspoon ground nutmeg
-          1/2 teaspoon ground allspice
-          3 cups bread flour
-          1 package (1/4 ounce) active dry yeast
-          1 egg white
-          1 tablespoon water
-          1 tablespoon cornmeal
Directions
1.      In a large mixing bowl dissolve yeast in the warm water. Add the pumpkin, brown sugar, salt, cinnamon, nutmeg and allspice; mix well. If using a mixer: add flour and mix until the dough comes together and forms a ball. If NOT using a mixer: Stir in enough flour to form a soft dough. Turn onto a lightly floured surface; knead until smooth and elastic, about 6-8 minutes.
2.      Place in a bowl coated with cooking spray, turning once to coat the top. Cover with plastic wrap and let rise in a warm place until doubled, about 1 hour.
3.      Punch down dough; shape into 9 balls. (I weighed mine, they came out to be about 2.7 ounces)
4.      Push thumb through centers to form a 2-inch hole. Stretch and shape dough to form an even ring. Cover rest for 10 minutes. Flatten rings slightly.
5.      Fill a Dutch oven two-thirds full with water bring to boil. Drop bagels, two at a time, into boiling water. Cook 45 seconds; turn and cook 45 seconds longer. Remove with a slotted spoon; drain on paper towels.
6.      Whisk egg white and 1 tablespoon water, brush over bagels. Coat a baking sheet with cooking spray and sprinkle with cornmeal. Place bagels 2-inches apart on prepared pan. Bake at 400 degrees for 15-20 minutes or until golden brown.


Saturday, September 8, 2012

The last taste of summer

For me at least, back-to-school has always conjured a contradictory set of thoughts and emotions. I'm excited to see all my friends and get back into a regular schedule, but I'm nervous about the school work and whether or not I'll be able to adjust to new teachers and classes. I long for the cool nights and rich colors of fall while I savor the warm mornings and bright sparkle of summer. Spanning the years from backpacks and crayon boxes to laptops and textbooks, dealing with the resolution of these opposite thoughts and emotions has always resulted in a whirlwind of anxiety-inducing adjustment.

As I result, it's been quite a while since I've had the opportunity to post. I've been busy meeting up with friends, studying, attending club meetings, adjusting to classes, and getting used to my new job. As time flies by, the amount of work I have to do seems to increase as I struggle to complete it (Can that even actually happen?!). Anyway, as I was looking through the picture on my computer, I saw the pictures of my favorite chicken chili and I remembered, for a brief second, the long, relaxing exhalation that is summer break. I remember making the chili just a week or two before heading back to school in an attempt to savor the time in the kitchen with my mom. It was a pot of comfort made with the heat of summer and the love of home (and fresh ingredients from my grandfather's garden). Just looking at the pictures of the dish brought back the feelings of only a few weeks ago, when life was slow and steady and stable.

The chili is an adaptation of the chili made by Giada De Laurentiis. She is my absolute favorite Food Network chef. She epitomizes the process of incorporating love and family backrground as well a passion for cooking into her food.

1. Some of the ingredients (pre-measured because the cooking process is fast) required to make the chili, including fresh peppers from my grandpa's garden and locally bought corn from a near-by farm.
2. The ground chicken cooking through with the onions and garlic.
3. The pot just after the corn, stock, beans, and corn were added. I love the warm colors (and the rich scent).


Ingredients

  • 2 tablespoons olive oil
  • 1 large onion, chopped
  • 4 garlic cloves, minced
  • 2 pounds ground chicken
  • 1 teaspoon salt, plus more for seasoning
  • 2 tablespoons ground cumin
  • 1 tablespoon dried dill
  • 1 tablespoon dried oregano
  • 2 teaspoons chili powder
  • 3 tablespoons flour
  • 2 (15-ounce cans) cannellini or other white beans, rinsed and drained
  • 2-3 bell peppers, chopped
  • 11/2 cups corn (steamed in the microwave)
  • 4 cups low-sodium chicken stock
  • 1/4 teaspoon crushed red pepper flakes

Directions

In a large heavy-bottomed saucepan or Dutch oven, heat the oil over medium-high heat. Add the onion and cook until translucent, about 5 minutes. Add the garlic and cook for 30 seconds. Add the ground chicken, 1 teaspoon salt, cumin, dill, oregano, and chili powder. Cook, stirring frequently, until the chicken is cooked through, about 8 minutes. Stir the flour into the chicken mixture. Add the beans, peppers, corn, and chicken stock. Bring the mixture to a simmer, scraping up the brown bits that cling to the bottom of the pan with a wooden spoon. Simmer for 55-60 minutes until the liquid has reduced by about half and the chili has thickened. Add the red pepper flakes and simmer for another 10 minutes. Season with salt and pepper, to taste.


Sunday, August 12, 2012

Coconut Nut

*
I’m a coconut nut! Whether it’s sweet or savory, I love the tropical, fresh flavor of creamy coconut mixed into a multitude of dishes. Last year, I was even lucky enough to taste freshly cracked coconut at a smoothie stand on St. Maarten (heavenly!) Anything from the unique, chewy texture of raw, shredded coconut, to the creamy smoothness of coconut milk to the crisp crunch of toasted coconut makes my taste buds go crazy.
Though I’m not too picky about my coconut, I have to admit that my favorite coconut dish happens to be a salad at my favorite restaurant. Yes, I did say “salad,” but no, it’s certainly not health food. Though it starts with a wholesome base of greens, strawberries, and slivered almonds, it’s topped with its crispy, amazing crown jewel, the coconut breaded chicken. I love this chicken so much that I will eat all the healthy ingredients first just so I am left with the fantastic chicken, just me and it, to savor and love.  It has a crispy, tangy outside with soft, tender chicken on the inside. If you haven’t figured it out by now, I LOVE it.
Unfortunately, the fried exterior isn’t exactly the most nutritious option, so I can’t indulge myself too often. Instead, I tried to create a slightly healthier version with smaller, baked coconut breaded chicken tenders. They still incorporate the creamy, chewy coconut flavor and texture without the greasy, fried crust. Though the coconut doesn’t crisp up as much with just the oven heat, the mild flavor of the tropical fruit is truly showcased alongside the unseasoned chicken.  My dad said they needed a little bit of sauce, and I have to say, for someone who doesn’t love coconut as much as I do, I can understand the need for a little extra flavor. Some recipes for coconut chicken that I found recommended orange or honey sauces on the side. I can't say that the recipe can truly compete with the amazing coconut chicken salad at Chocolate Avenue Grill, but as a healthy subsitute, it's not too bad.

*
To go with the chicken, I wanted to stick to bright, fruity flavors. I chose to make some steamed, orange rice topped with orange zest and toasted coconut.  The rice was slightly sweet with fresh squeezed orange juice flavor. The texture of the wild rice mixed perfectly with the crunch of the toasted coconut. I used my mom's method of placing a bowl with the rice and cooking liquid inside of a ceramic cooker with a lid. The  cooker is then filled with water about 2 inches up the side. The lid is then placed on the cooker on a hot stove where the water can boil and steam the rice in the bowl.


*

Baked Coconut Chicken
adapted from Spark Recipes

  • 2 boneless, skinless chicken breasts
  • 1 Cup panko bread crumbs
  • 1 Cup unsweetened shredded coconut
  • 1 egg and 1 egg white, beaten together
  • salt and pepper to taste
  1. Preheat oven to 350 degrees. Line a baking sheet with parchment paper. Combine the panko and coconut in a small bowl.
  2. On a clean and separate surface, cut chicken into thin strips.
  3. Dip and coat the chicken individually in the egg mixture. Then, immediately dredge in the coconut and panko mixture. Coat to desired thickness. Place each piece on the prepared baking sheet. Sprinkle with salt and pepper.
  4. Bake the chicken in the preheated oven for roughly 25 minutes. Cooking time varies with ovens and tender sizes, so bake until the coconut starts to brown and chicken is completely cooked through. (My chicken did not brown completely so I broiled it for 1-2 minutes at the end of the cooking time).

Orange Toasted Coconut Rice
  • 3/4 Cup fresh squeezed orange juice
  • 3/4 Cup coconut water
  • 1 Cup wild rice
  • 1 tbs. orange zest
  • 1/4 Cup toasted coconut
  1. Prepare rice in whatever way you are most familiar with (I steamed it, as mentioned above), soaked in the combination of coconut water and orange juice.
  2. While rice is cooking, toast coconut in the oven. (I toasted my coconut while the chicken tenders were baking. I scattered it on a baking sheet lined with parchment paper, placed it in the oven and checked on it frequently, removing it when it browned and crisped slightly.)
  3. When rice is finished, stir the orange zest into it and top with toasted coconut.

*Sorry about the terrible pictures. My mom and I were quite hungry by the time this dinner was finished, and we completely forgot to take pictures. These pictures were taken about halfway through the meal.

Saturday, August 4, 2012

The Birthday Trade-off


                    In late June, I started my first ever summer class. There are so many courses that I wanted/ needed to fit into my schedule for the fall semester that I felt the summer was a good time to get a required course out of the way. So, I decided to sign up for CAS 100 (Effective Speech) through my local branch campus.  Luckily, the class only meets twice a week, Mondays and Wednesdays from six to nine, and it only lasts for roughly eight weeks. Also on the positive side, my professor is very relaxed and capable of putting the class at ease (which is very important when you have to prepare and give five speeches in front of that very class). So overall, even though I’d rather be out in the summer sun or spending time with my friends, my first summer class has not been an unbearably painful experience.

                There was one major downside to this particular summer class. It’s not the exams, or the speeches, or the three hours of sitting in a cold room. It’s that one of those Wednesday classes happened to fall on July 25th. What’s so special about July 25th? Well, it just happens to be my birthday. Through my 13 years of public school, having a birthday right in the middle of summer meant I never had to endure class, or worse, an exam on my birthday. I never had to wake up early or study or impatiently watch the minutes tick by on the clock while a teacher lectures on my birthday. It made for 18 years of blissful, stress-free birthdays. But, do to my first ever summer course and an unfortunate coincidence of dates, I had to endure not only a class on my birthday, but also, one of the two exams that the class requires. Instead of the typical birthday dinner that is our family tradition, I spent my evening studying for and taking an exam on effective speech tactic. Truly scintillating!

                Ok, I’m being a little dramatic. It really wasn’t that bad.  The exam was really easy, even comical. (My professor has a very pronounced sense of humor) The family dinner was rescheduled and was just as delicious a week after my birthday. I still didn’t have to wake up early and one 3 hour class is much better than an entire day of school. The occurrence of class on my birthday actually provided me with an opportunity that I had always wanted to have as a kid.

                In elementary school, the “cool” thing to do was to bring in your favorite baked treat to share with the class on your birthday. I saw and ate everything from homemade gooey chocolate chip cookies to the store-bought, brightly colored, whipped cream frosted cupcakes, depending on the tastes of the child whose birthday was being celebrated.  The treats were handed out by the birthday boy or girl on neatly folded napkins while the class sang “Happy Birthday” to him/her. I always enjoyed the treats and the singing, but there was a part of me that was a little jealous that I wouldn’t be able to share my favorite treat with the class.

                So, in true kindergartener-at-heart fashion, I decided to bake my favorite birthday treat for my class full of adult students.  I chose the chocolate cake that my mom always baked for me for my birthday, and formed it into individual, easy-to-handle cupcakes. I loaded the cupcakes with delicious peanut butter buttercream frosting, once again reuniting my two favorite flavors. I even brought my own colorful napkins for serving. The best part, though, was when my class decided to sing happy birthday to me! Even though I was celebrating my 19th birthday, I felt like a little kid again, savoring the moment in the birthday spotlight.

                So, all in all, having class on my birthday was a nice trade-off for the opportunity to serve my cupcakes while being sung to.


Chocolate Cupcakes


  • 3/4 Cup Salad Oil
  • 2 Eggs
  • 1 tsp. Vanilla
  • 3/4 Cup Unsweetened cocoa powder
  • 2 Cups Flour
  • 2 Cups Sugar
  • 2 tsp. Baking soda
  • 2 tsp. Baking powder
  • 1/2 tsp. Salt
  • 1 Cup Milk
  • 1 Cup Hot Coffee
1. Preheat oven to 350 degress F.
2.  In a mixer bowl, combine salad oil and sugar. Blend well. Add in eggs one at a time. Slowly add hot coffee and milk, making sure not to cook the eggs. Add vanilla.
3. In a separate bowl, sift together cocoa, flour, baking soda, baking powder, and salt.
4. In small batches, combine the dry and wet ingredients.
5. Scoop batter evenly into a cupcake pan. (The cupcakes will rise so do not overfill).
6. Bake for 25 minutes. Check centers with a toothpick for doneness.

Peanut Butter Buttercream

  • 3/4 Cup Butter
  • 1/2 Cup Creamy peanut butter
  • 1 tsp. vanilla
  • 3-4 Cups powdered sugar
  • 3-4 tbs. milk
1. Combine butter, peanut butter and vanilla.
2. slowly add in powdered sugar, being aware of the texture.
3. Add in milk (amount depends on desired texture).
 
COOL THE CUPCAKES, FROST AND SAVOR!


Saturday, July 21, 2012

Splurge on the Urge


I’m a planner. I thrive on the consistent and the expected. I eat my meals at roughly the same time every day, maintain a fairly regular “bedtime,” and keep a normal exercise schedule.  My guess is that this is just an expression of my type A personality. Basically (extrapolated a little from my chemistry class), the world naturally tends toward entropy, or chaos.  If I maintain a consistent schedule, then I avoid most of the effects of chaos’ influence and keep my perfect, little, type A world (or, at least, I like to believe so).
                Unfortunately, there is that one thing that I just can’t avoid. I think its called human nature or something like that. Even when I think I know exactly what I should do, I change my mind and want to do something completely different… something new, something reminiscent or something just plain exciting. So, despite my propensity for planning, I sometimes have random urges to do certain things (some normal and some unusual). Some of my most recent urges include:
1.       Dip dying my hair purple (I got the dye, but I still haven’t done it yet)
2.       Going to the drive-in
3.       Seeing the Dark Knight Rises at midnight
4.       Starting a blog? (Ok, that wasn’t THAT recent)
5.       Having a tie dying party
6.       Playing paintball (unfortunately, I haven’t gotten ahold of a paintball gun)
7.       Taking a day trip to Philly
8.       Going to see a musical
Despite this random list of things, my most common “urges” are the ones that require a kitchen, some delicious ingredients, and some good old oven heat. I’ll just be sitting at a table, reading a book or watching TV and my Martha Stewart senses will start tingling. Thoughts of cookies, cakes and pies will start running through my head, and I will make my way to the fridge to start scoping out ingredients. Then I let the internet, the family recipe book and my imagination guide me to the ultimate reward for following my intuition- some delicious food!
So, recently, as I was sitting at the table drinking my tea and reading the newspaper (Do the comics count?), I had the urge to bake something. To add to the strength of my impulse, I was going to be hanging out with a group of friends that night so it just made sense to bring them a tasty treat.  I started perusing the family recipes and came across a forgotten sugar cookie recipe. The last time I had these cookies was when I was in eighth grade (that was in 2007…). My mom got the recipe from a friend of my sister’s grandmother and decided to bake them for my basketball team. They were a hit! She ended up making them for every single home basketball game. All of the players would anticipate the sight of the box of gooey, cakey sugar cookies, covered in crunchy sprinkles, after a hard fought game.  My mom didn’t mind such a responsibility, though, because the cookies were quick to whip together and produced a bounty of oversized cookies.
When I came across the recipe, I knew I had to make them. What’s more fun to bake for friends than a batch of massive cookies topped with whimsical rainbow sprinkles? Unfortunately, we were out of sour cream and cream of tartar. So, what did I do? Try another recipe? Wait until later to bake? Sit and sulk because I didn’t have the ingredients? NO. I grabbed my wallet and headed to the grocery store just so I could get those two simple ingredients to make my cookies! (Not a very planner-like decision)


Oh boy! It was worth it! Even with tablespoon size globs of batter, the cookies came out huge. They were super soft, just as I remembered them, with a sweet, cakey inside and a moist, lightly browned outside. Some came out a little funny looking because I forgot how much they spread, so I decided to improve the looks of those particular cookies with a simple vanilla glaze, topped with MORE sprinkles. I can’t believe I lived without these cookies for 5 whole years of my life!


Grandma’s Sugar Cookies

Ingredients
·         1 cup margarine (benecol)
·         2 cups sugar
·         3 eggs
·         4 cups flour
·         1 cup sour cream
·         2 tsp baking soda
·         1 tsp cream of tartar
·         1 tsp vanilla
Directions
1.       Preheat oven to 375° F.
2.       Cream butter and sugar. Add eggs, beat until creamy.
3.       Combine flour, baking soda, cream of tartar. Add flour mixture to butter cream, little by little.
4.       Add sour cream and vanilla. Blend well.
5.       Use a small or medium cookie scoop and drop on a greased or parchment lined cookie sheet. Allow the cookies plenty of room to spread.
6.       Sprinkle with colored sprinkles, cinnamon sugar or leave plain. Bake for 8-10 minutes (until edges are lightly browned).
7.       Remove from sheet and allow to cool. If you decide to glaze the cookies, wait until they cool.

Simple Vanilla Glaze

Ingredients
·         2 cups powdered sugar
·         2 tbs milk
·         1 tsp vanilla
Directions
1.       Combine all ingredients in a bowl.
2.       Whisk until a thick, even glaze comes together.
3.       Adjust consistency by adding more sugar or milk.
4.       Drizzle or spread on cooled cookies.